How to replace Heater Hoses
Whether it is ye olde
folk law or something more mystical, the mention to
most imp owners that you need to replace the heater
hoses has owners running for the hills!
But it is not as difficult as you imagine.... though
it can be a bit fiddly.
Tools Required
Sharp Knife, Screwdriver/Hose Clip Driver, Gaffer
Tape, Trim Clip Tool/flat bladed tool, 7/16 and
11/16 AF spanners, general screwdrivers/tools etc.
Supplies Required
2x 5m lengths of 5/8" (16mm) bore heater hose
(extra if you are going to replace the engine bay
hoses), hose clips - might as well replace the
engine bay hoses as well if they look like they need
to be replaced, Talcum Powder, some strong nylon
cord and if possible a spare pair of hands, can do
the job on your own but some extra hands help!
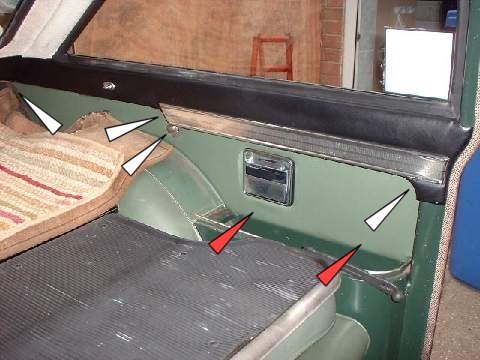
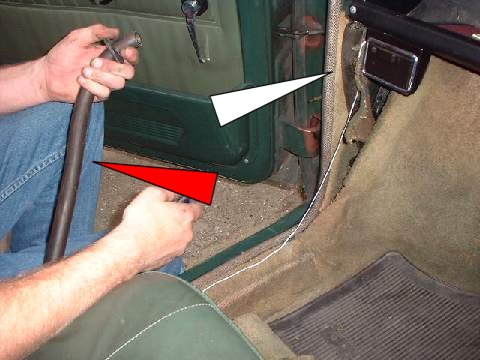
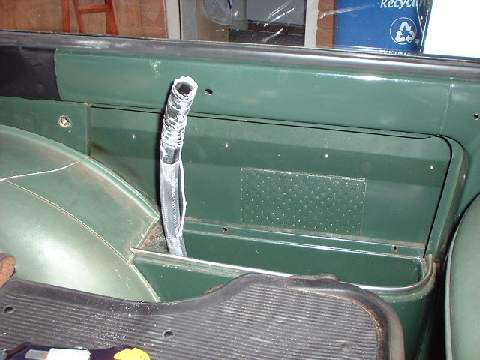
- First job when
doing this is to drain the coolant from the car,
the Haynes or Rootes Manuals detail this so we
will not go into this here. Next major job is to
remove the interior trim that goes over the rear
wheel arch, (fig1) this is in order to get to
the hoses. The white arrows indicate a
bolt/screw to remove and the red ones show the
location of trim clips. You can undo the latter
with a proper trim tool or carefully spring them
out with a flat bladed tool. The long trim panel
is held in along its top length by the car, so
to remove you need to pull it out from the
bottom.
Fig 1
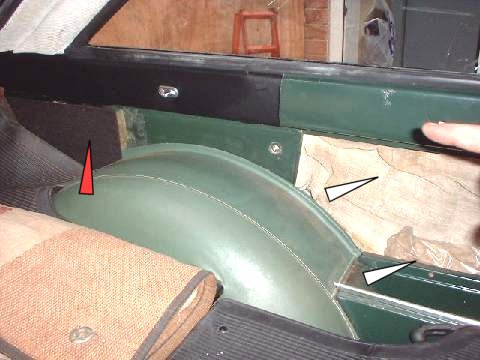
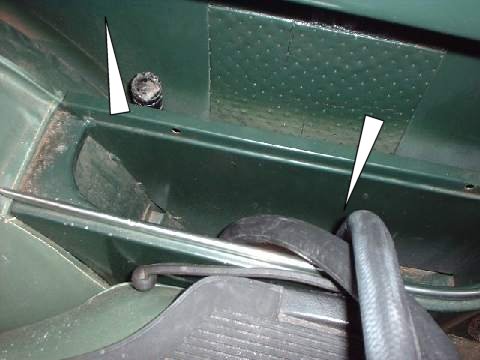
- After you have
removed the long hardboard panel, depending if
your car is original, you may or may not find a
large fabric 'pillow' (fig 2) - this is part of
the sound deadening system, carefully remove
this trying not to tear or rip the fabric. Also
if you look into the rear wing cavity you may
find a number of plastic bags filled with paper
pulp (these are known as crushed sheep!), also
carefully remove these, there are lots of sharp
edges in the cavity that can tear the bags (and
you!). You may need to remove the small card
trim (red arrow) You also need to remove the
small bits of trim that are stuck to the bottom
passenger pockets - these are just held in place
with a blob of glue..
Fig 2
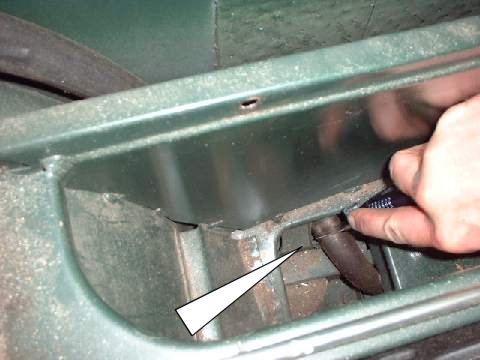
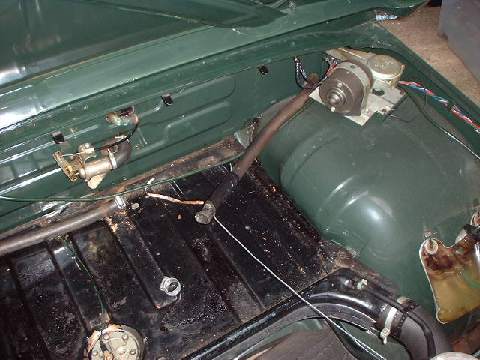
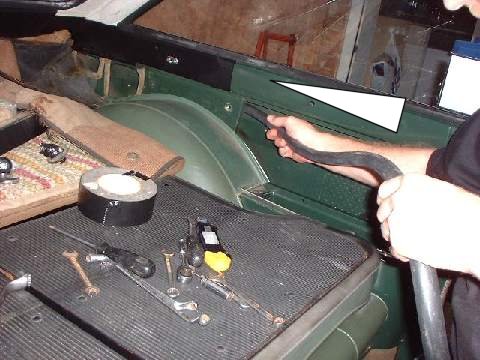
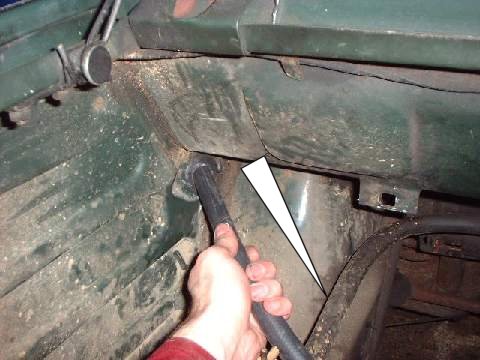
- Right next into
the engine bay, you are going to replace them
anyhow, so just cut through the heater hose
where they pop into the engine bay (fig 3 and
fig 4)
Fig 3 and 4
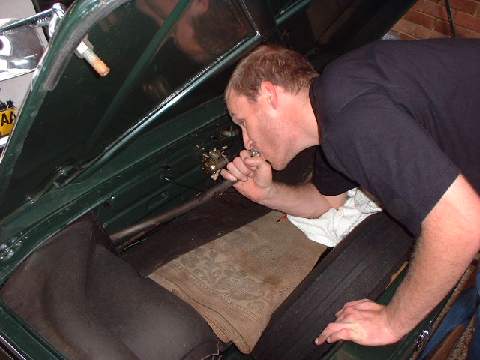
- Ok, now round the
front of the car, remove the card trim in the
luggage bay, hold the ends of the hose up in the
air, put a cloth over the end and give them a
good blow (fig 5), this will help get any
trapped water out, that could end up in your
sills when you get to later operations.
Fig 5
- Ok the next bit
is optional, though if you are working on your
own, I would recommend you do this as it will
help when you are fitting the new hoses. Tape
some lengths of the strong cord (about two
metres) to each end of the heater hoses. Then
from the engine bay push the hoses in to the
holes in the car until they disappear, the
grommet might come out as well but don't worry,
just don't drop them into the rear wing cavity
(strings helps prevent this), Then working from
inside the car, pull the hose over the rear arch
into the car (Fig 6 note nylon cord) and from
the front, pull the hoses into the front
footwell - you may need to gently pull the
carpet away (if you have any!) from the front
arch so you can get to the hoses.
Fig 6

- Ok after you have
the rear end of the hose in the car, cut through
the heater hose at the 'S' bend using a sharp
knife *NOTE*
when doing this on the drivers side be careful
not to cut through the wiring loom! see
fig 7.
Fig 7
- From the front,
pull the hoses into the front footwell, you can
use cord here as well if you want fig 8 - you
may need to gently pull the carpet away (if you
have any!) from the front arch so you can get to
the hoses.
Fig 8
- Ok trim off the
excess part of the front hose (red arrow fig 9)
but leave about 60cms (2') sticking out of the
sill (white arrow)
Fig 9
- Ok get a length
of new Heater hose (white arrow fig 10), hold it
up to the end of the old heater hose (red arrow
fig 10) where it sticks out the front part of
the sill. Tape together using gaffer tape. Don't
start wrapping right on the join, start a little
way from the join and work towards and past the
join, make sure
the tape is tight and smooth! fig 10.
Once you have taped the join, give it a little
pull, it should be secure, i.e. you should not
be able to pull the hoses apart.
Fig 10

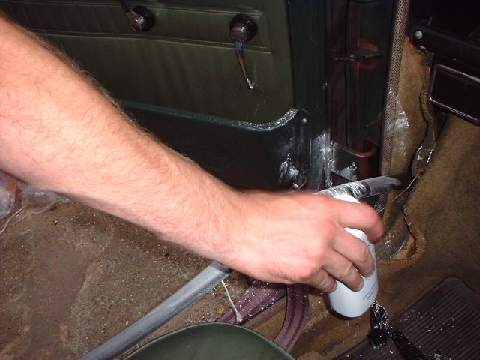
- Next step is to
lightly (please note Allan!) dust the new hose
with french chalk or talcum powder, Allan here
bought some nice smelly baby powder, but old
spice talc is ok as well! This stops the new
hose sticking.
Fig 11
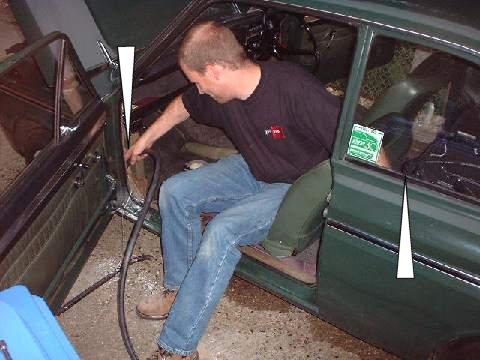
- If you have a
spare pair of hands, get your helper to
push/feed the taped joint in the car whilst you
pull out the old hose from the 'S' bend area
where you made a cut in old hose (fig 7). If you
are on your own, sitting in the position shown
in fig 12 makes it easier to push and pull.. you
need to push the hose at one end and pull at the
other or it will get stuck.
Fig 12
- TA DA the new
hose will pop out of the pocket, now you can cut
through the join between the old and new hose,
discard the old hose, you will then be as fig 13
Fig 13
- Right with the
new hose in, you by push/ pulling, be able to
slide the new hose back and forth in the sill.
Right this is where we had a little problem...
the plan was to slide the new hose back down the
sill a bit so we could feed the end of the hose
though the 'S' bend, while pushing the new hose
down into the sill at the front. We got the new
hose through the 'S' bend but for some reason it
got stuck..on what we are still not sure! So
instead we pulled the end back out of the 'S'
bend and then pulled the hose up into the rear
pocket so there would be enough hose to get to
the engine bay. We then looped the end back down
into the rear pocket and through the 'S' Bend
fig 14.
Fig 14
- By doing this,
you can kink the hose, but with a little
fiddling and twisting you can correct this.. make sure there
are no kinks in hose before continuing
- Ok now you will
have loads if heater hose in the rear wing
cavity, now if you used cord as above when
removing the old hose, tape the cord to the end
of the heater hose with gaffer tape so you get
the cord 'inline' with the hose. i.e.. cord
expanding out to the hose with tape and no
steps.. If you have a helper or are not
bothering with the cord, then push the hose in
the cavity for about a 1 meter or so see fig 15.
Fig 15
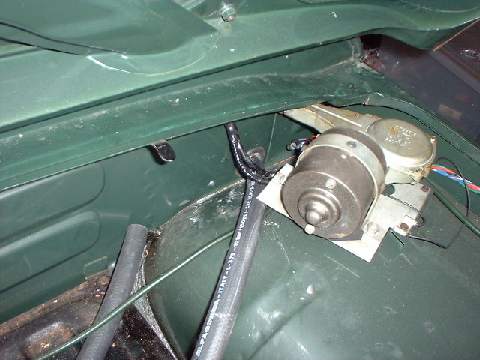
- At this point go
round or send you helper round to the engine
bay, if the grommet came out when you took the
old hose out, refit it now and dust it with a
little talc. If you are using the cord method,
by pulling the cord the hose should be pulled
into the grommet when the, hold the grommet in
place while you pull the hose through it. If you
are not using the cord method, get you helper to
put a finger through the grommet while you push
the hose towards it from inside the car. You
help should be able to guide the hose into and
through the grommet, again hold the grommet in
place while you pull the hose through it fig 16.
[b]Fig 16
- You need to do
the same thing at the front, i.e. refit the
grommets and then pass the hoses through them
and you will be as figs 17 and 18.
Fig 17
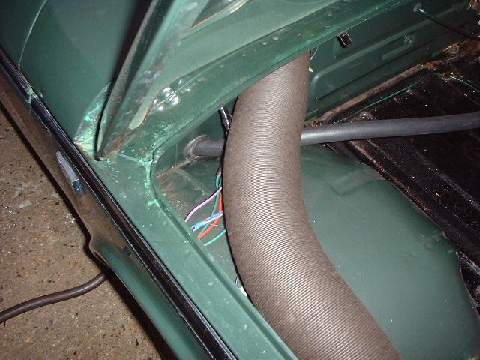
Fig 18
- Right that is it!
all you need to do is to trim the ends to the
right length, connect the hoses back up, refit
all the trim in the car and refill the car with
coolant and bleed the system. Remember it is
worth replacing the engine bypass hose and the
short hose between the 3 way junction and the
water pump, before you refilling the system with
water/antifreeze mix.
- There are a
couple of other ways to do the above heater hose
swap, mainly going the other way i.e. from back
to front rather than from front to back, and
also going through the 'S' bend as part of going
from back to front. I hope to have a photo how
to 'extra' on this method soon.


